README
@akr4/gatsby-plugin-og-image
Description
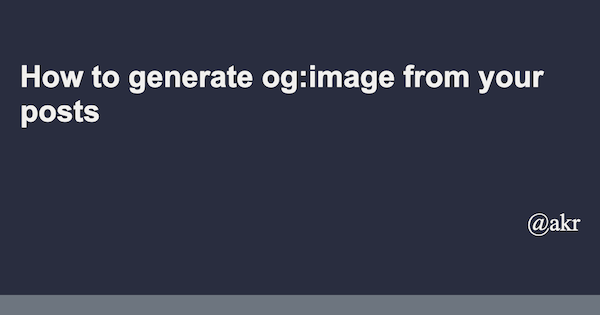
Generates images for og:image for pages and set <meta property="og:image"> in your HTML statically and dynamically. During build time, Headless Chrome renders your template HTML and makes the images.
The image below is an example.

How to install
npm install @akr4/gatsby-plugin-og-image
Examples of usage
module.exports = {
  plugins: [{
    resolve: `@akr4/gatsby-plugin-og-image`,
    options: {
      siteUrl: `https://example.com`,
      render: renderOgImage,
      concurrency: 10,
    }
  ]
};
| property | default | description |
|---|---|---|
| siteUrl | your site URL | |
| render | a function to render og:image that takes ogImagePlugin property value in the page context. |
|
| concurrency | 3 | the number of instances of Headless Chrome |
| width | 1200 | view port width of Headless Chrome |
| height | 630 | view port height of Headless Chrome |
The following is an example render function. It takes title and render it at the center of the page.
const renderOgImage = ({ title }) => {
  return `<!DOCTYPE html>
<html>
<head>
<meta charset="utf-8">
</head>
<body style="
  padding: 0;
  margin: 0;
">
<div style="
  width: 1200px;
  height: 590px;
  background-color: #292D3F;
  color: #F1F0EE;
  display: flex;
  flex-direction: column;
  justify-content: center;
  border-bottom: 40px solid #6D757F;
  ">
  <div style="font-family: sans-serif; font-size: 60px; font-weight: bold; margin: 0 40px;">${title}</div>
  <div style="font-family: serif; font-size: 48px; margin: 160px 40px 0 auto;">example.com</div>
</div>
</body>
</html>
`;
};
The title argument comes from the ogImagePlugin property of the page context. For example, you can configure it by createPage.
createPage({
  path: '/my-first-page',
  component: blogPost,
  context: {
    ogImagePlugin: {
      title: 'My first page',
    },
  },
});
You can set whatever you want to ogImagePlugin property and use them in the render function. ogImagePlugin property will be removed after generating an image.
The following function is an example of how to configure when the source is markdown.
exports.createPages = async ({ graphql, actions }) => {
  const { createPage } = actions;

  const blogPost = path.resolve(`./src/templates/blog-post.tsx`);
  const result = await graphql(
    `
      {
        allMarkdownRemark(sort: { fields: [frontmatter___date], order: DESC }, limit: 1000) {
          edges {
            node {
              fields {
                slug
              }
              frontmatter {
                title
              }
            }
          }
        }
      }
    `,
  );

  if (result.errors) {
    throw result.errors;
  }

  const posts = result.data.allMarkdownRemark.edges;

  posts.forEach((post, index) => {
    let ogImagePluginContext;
    if (post.node.frontmatter && post.node.frontmatter.title) {
      ogImagePluginContext = {
        title: post.node.frontmatter.title,
      };
    }

    createPage({
      path: post.node.fields.slug,
      component: blogPost,
      context: {
        ogImagePlugin: ogImagePluginContext,
      },
    });
  });
};
